Loading a local file and Waveform generator in Hype
by: Mark Hunte
Hype Features Discussed in this article:
• Choose file from Local device
• Embedding WaveSurfer library
• Display your Audio file in a WaveForm
In this article I will show you few things,
• How to let the user load a file from their local device into the browser, from there you can use the file in your Javascript.
• How to make your choose file element look nice.
• And how to add the wavesurfer.js plugin for audio waveform generation to your Hype project which will then use the loaded file.
It often makes sense that the user can choose and load their own files to use with your web page, rather than you keep having to add the file/s to the project.
All modern browsers pretty much allow you to add code for the user to choose a file to load into the document but will not allow the actual path to users file to be displayed or used without making it anonymous to the browser and therefore the javascript scope. This is a security feature to protect the user.
But once it has passed the file path through these measures you can get an url of the new file object to use in your code.
You will be able to get properties like the file name and use the anonymised URL reference
But for example if you try and print out the URL using ‘console.log()’, you will get something like:
[Log] blob:null/b94c2a8b-e0ae-4125-81fa-f16137f40e71
Creating an Input button
My normal way is to use a form with an input type of ‘file’ in an elements innerHTML.
<form onsubmit="return false">
 <input type="file" size="25" id="files" name="files[]" value="" placeholder="file to this input" style="background-color:white;
 border: solid 0px #6E6E6E;
 height: 20px;
 font-size:15px;
 color:blue"><br>

</form>
Which gives me :
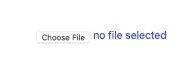
A bit ugly. So I use some css style tricks to make the input button invisible and then place it above some Hype elements that will be the visual button that we see.
<form onsubmit="return false">
<label for="files"> <div>IIII</div></label>
 <input style="visibility: hidden; position: absolute;" type="file" size="25" id="files" name="files[]" value="" placeholder="file to this input"><br>
 </form>
The <label> tag is used to give the input a new clickable area, the <Div> adds some space. None of it will be visible.
We hide the actual input with visibility: hidden; position: absolute;
I then layer some elements under the input element that look like a button.
This gives me:

The input element is floating on top of this and they are all then grouped together.
Get the file URL reference
Ok so we now have our nice button.
We need to get the file objects url from the file that is chosen.
In a Hype javascript function loader(); that loads on scene load, we add an event listener to see when the input has changed.
( clicking the input and choosing something will change it’s value. )
hypeDocument.getElementById('files').addEventListener('change', playSelectedFileInit, false);Note we add the addEventListener to the hypeDocument, you can also add it to the document . Both work in this case.
Also the #files id that we are looking for is in the innerHTML of the <input>, NOT in the element inspector.
‘change’, = the event
playSelectedFileInit = the function to run when triggered.
(false = useCapture. But Lets not worry about that as it is not important here. ).
Now the important function.
 function playSelectedFileInit(event) {
    var file = this.files[0];
  window.fileURL = URL.createObjectURL(file);
    } ;
As you can see for our purposes not a lot of code to convert the chosen file’s path to an URL.
You can read up on the createObjectURL API here
We also put the new URL object into a global var so we can then use it wherever we want. i.e other hype functions.
In the real example the actual function I use has a bit more code to do with what we want to do with the URL, like getting the waveform generator to load the file.
Here is the full Hype loader() function with the code we have so far discussed.
hypeDocument.getElementById('files').addEventListener('change', playSelectedFileInit, false);

function playSelectedFileInit(event) {

        hypeDocument.getElementById('errorText').innerHTML = '';

    	var file = this.files[0];

	 	window.fileURL = URL.createObjectURL(file);

  		window.wavesurfer.empty()

		window.wavesurfer.load(window.fileURL);

        } ;
Adding Wavesurfer to our Project
Although we have some code in the loader() hype function. It will do nothing put produce errors if we do not load the plugin and create a wavesurfer object.
We first need to add this line of code to the head file to link to the plugin.
<script src="https://cdnjs.cloudflare.com/ajax/libs/wavesurfer.js/1.0.52/wavesurfer.min.js"></script>
Next we need to create a new Hype function wavesurfer() that will create the wavesufer object.
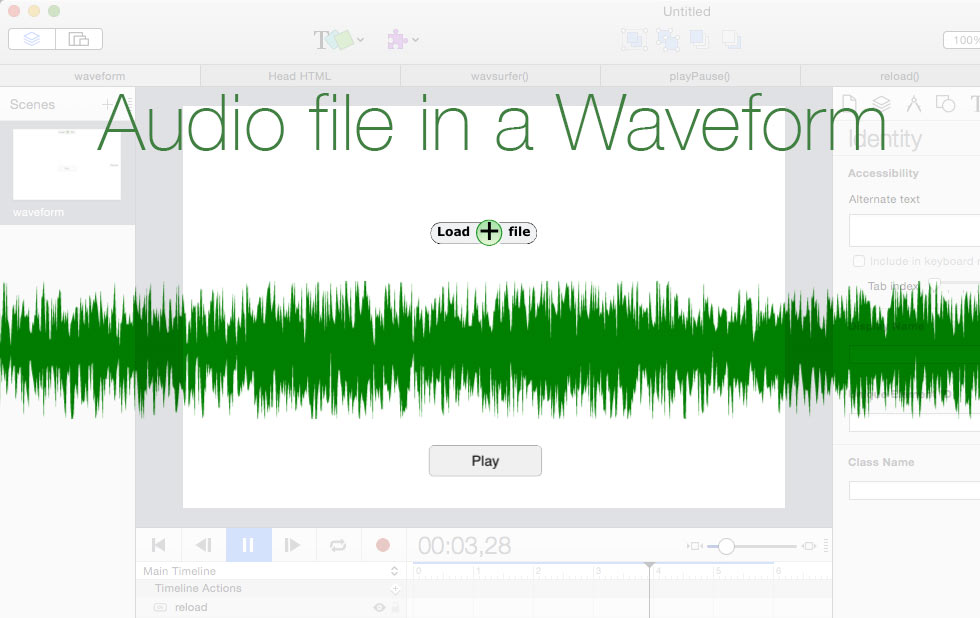
window.wavesurfer = WaveSurfer.create({
 container: '#waveform',
 waveColor: 'green',
 progressColor: 'black'
});

wavesurfer.on('error', function (e) {

 hypeDocument.getElementById('errorText').innerHTML = e;
});
Most of that is self explanatory but a couple of things;
#waveform is the id of an Rectangle element we need to add to the scene to contain the generated wave form. Once you add the element, give it the id of waveform in the element inspector.
Also in the example I use the wavesurfers error events to check for errors and display them in a text element also added to the scene. id of errorText
All the code and options used to create the Wavesurfer object is part of the wavesurfer’s API. Which you should read for more detail.
For you own projects you may want to check for file type when loading files. (plenty of examples out there of how to do that)
That is basically it. In the Template provided you will see a couple of other Hype functions which deal with playing the audio playPause() and reloading the file and wave form reload().
They pretty much speak for themselves but briefly the reload function is hooked to a button that does what it says on the tin. I added this because when you re size the browser the wave form within the element does not resize.
I found that Wavesurfer is capable of loading audio from video files as well as Audio files.
Also the wave form is interactive and allows you to click to a point and play.
Summary
The URL.createObjectURL() static method creates a DOMString containing an URL representing the object given in parameter. The URL lifetime is tied to the document in the window on which it was created. The new object URL represents the specified File object or Blob object.
View Demo
855
Written by: Mark Hunte

![]() Loading...
Loading...